Wall upgrades can look inexpensive on a quote and become costly after demolition. The difference often lies in what sits behind the finish: damaged framing, uneven plaster, missing insulation, or moisture. A practical plan compares the full installed cost, not just the price per sheet or panel.
The National Association of Home Builders’ 2024 Remodeling Market Index reported continued growth in remodeling activity, while remodelers also identified labor availability as a business challenge. That matters. A low-cost wall finish can lose its advantage if it needs extra preparation, specialist installation, or repeated repairs. Get itemized estimates for materials, surface preparation, waste, labor, and disposal. Ask contractors to note assumptions in writing.
Building-science expert Joe Lstiburek is often associated with this wall-design principle: “The perfect wall is one that has all of the control layers on the exterior.” The detail may not suit every renovation, but it highlights a useful point: moisture and air control deserve attention before choosing paint, drywall, or decorative panels. A cheaper finish cannot compensate for a damp wall.
So, how to reduce renovation costs with wall materials? Match the material to the room, substrate, and expected wear. Standard drywall may suit a dry bedroom; a washable, moisture-resistant finish may be more practical near a busy kitchen sink. Compare lifecycle needs, not promises. Some estimates will still miss hidden damage. Leave a contingency, and inspect the wall before covering it.
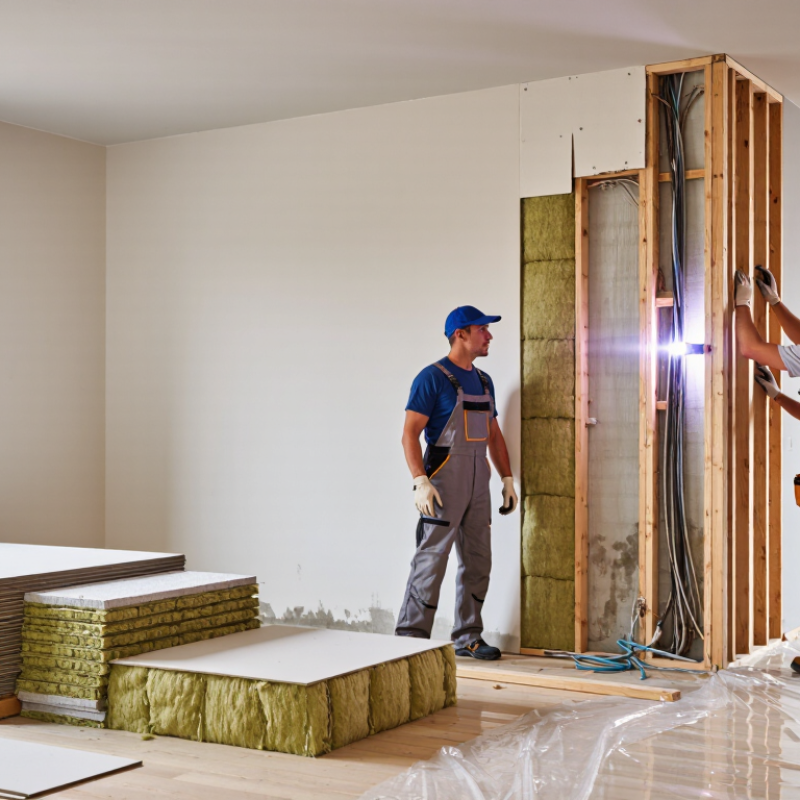
Understanding How Wall Materials Affect Renovation Costs
Wall materials affect more than the price printed on a sample. They influence labor, preparation, installation time, and future repair costs. A lightweight panel may be inexpensive, yet uneven studs can require extra shimming. Tile can last for years, but it needs a stable, carefully prepared substrate. The hidden work matters.
The 2024 U.S. Houzz & Home Study reported a median renovation spend of $24,000 for projects completed in 2023, up from $22,000 in 2022. That figure covers many project types, not wall materials alone, but it shows how quickly budgets can feel pressure. Compare complete installed costs, not just material prices. Ask contractors to separate demolition, surface preparation, material, installation, and finishing in their estimates. Small details add up.
For a 120-square-foot room, calculate waste before ordering. Patterned wallpaper may need extra rolls to align its design; large-format tile can also create costly offcuts. In a dry, low-traffic room, painted drywall may be practical and simple to patch. A busy hallway may justify a tougher finish, even with higher upfront costs. I would still check local labor prices—material comparisons can look precise, but labor varies widely.
Setting a Wall Material Budget Before Renovation
A wall material budget should start with the room, not a price per sheet. Measure each wall, note windows and doors, then calculate the usable area. Add a modest allowance for cuts, damaged pieces, and matching patterns. The right amount depends on the material and layout; a small room with many corners can create more waste than a large, simple wall.
Compare the full installed cost, not just the shelf price. Include primer, adhesive, fasteners, trim, tools, delivery, and labor if you are hiring help. Ask for written estimates that list preparation and cleanup. Keep a contingency separate from the material allowance, so a damp patch or uneven surface does not quietly drain the budget. Surprises happen.
Set priorities before choosing finishes. Spend more where walls get frequent contact, such as a narrow hallway, and consider simpler materials in low-traffic rooms. Check care requirements and expected durability against your household’s needs. One thing I have learned is that the cheapest option can cost more when repairs are awkward. Still, estimates are not guarantees; inspect the wall condition before committing, and leave room to revise the plan.
Comparing Wall Materials by Purchase and Installation Costs
How to Reduce Renovation Costs With Wall Materials?
Wall material costs involve more than the price of each panel, sheet, or tile. Installation can change the budget dramatically.
According to 2024 Angi cost data, drywall installation commonly ranges from about $1.50 to $3.50 per square foot, including labor and materials.
Standard drywall is usually the lowest-cost option for large, flat walls. However, it needs joint compound, sanding, and painting. Those finishing steps add time and dust. I have found that a slightly cheaper board can become expensive when the room has many corners or ceiling-height surfaces.
Decorative wall panels often cost more to purchase, but installation can be faster. Tile usually requires a higher material budget and skilled labor, especially when waterproofing is necessary. The 2024 RSMeans Construction Cost Data emphasizes regional labor differences, so national averages should not control your estimate. A local quote matters more.
A useful comparison is total installed cost per square foot, not shelf price alone. My own rough budgets sometimes miss waste, delivery, and surface repairs. That is worth admitting.
Tips:
- Measure each wall carefully and add 10% for cutting waste.
- Request separate material and labor prices.
- Ask whether sanding, priming, waterproofing, disposal, and trim are included.
- Compare two or three installers using the same scope.
- Choose moisture-resistant materials only where conditions require them; using them everywhere may waste money.
- Include repair time in your decision, because the cheapest purchase is not always the cheapest renovation.
Choosing Durable Materials to Reduce Long-Term Expenses
Durable wall materials can cost more upfront, but the purchase price is only part of the renovation budget. In a busy hallway, washable paint or impact-resistant wall panels may withstand scuffs better than a delicate finish. In damp rooms, choose materials rated for moisture and pair them with suitable ventilation. Otherwise, even a strong surface can develop stains or peeling. Check the product’s care instructions and installation requirements before comparing prices.
Think about repair costs, too. A wall covering that can be patched in one small area may be cheaper to maintain than one that requires replacing an entire section. Keep spare tiles or a small amount of matching finish when practical; colors and textures can vary between production batches. Ask an installer how the material handles seams, corners, and everyday cleaning. Those details matter. A sample that looks sturdy in a showroom may feel different under repeated wiping at home. I once focused too much on appearance and overlooked maintenance, which made the cheaper option less appealing over time. Durable does not mean indestructible. Choose a material suited to the room, your household’s habits, and the repairs you are willing to manage.
Reducing Waste and Labor Costs During Wall Installation
A wall installation can waste material before the first panel goes up. Check that framing is straight, dry, and ready for the chosen wall material. Uneven studs can force awkward cuts and leave gaps that need extra finishing. Measure each wall, then sketch openings, corners, and visible seams. A simple layout helps place offcuts where they can still be used. Keep measurements on the drawing, not only in someone’s memory. Small gains add up.
Cutting plans work best when panels are staged in installation order. Label pieces lightly, protect finished edges, and keep the cutting area clear of dust and scraps. This reduces searching, repeated handling, and avoidable damage. For a shared work area, agree on who measures, cuts, and installs each section. That handoff can prevent two people from making the same cut—or waiting for one. Still, layouts are not perfect. A late change to an opening may make a saved offcut useless, so check dimensions on site before cutting. Track waste at the end of each day; a few narrow strips may reveal a recurring measurement mistake. Planning takes time, but rushing often costs more in replacement material and labor.
How to Reduce Renovation Costs With Wall Materials? - Reducing Waste and Labor Costs During Wall Installation
Indicative U.S. residential planning ranges. Compare materials only when the required finish and performance are similar.
| Wall material |
Common panel size |
Planning waste allowance |
Indicative material cost |
Estimated installation labor |
Potential cost-control approach |
| Standard gypsum drywall |
4 × 8 ft (32 sq ft) |
10–15% |
$0.30–$0.60 per sq ft |
4–7 person-hours per 100 sq ft |
Plan sheet layout around wall dimensions and openings; reuse clean offcuts for smaller areas. |
| Large-format gypsum drywall |
4 × 12 ft (48 sq ft) |
8–12% |
$0.45–$0.85 per sq ft |
3–6 person-hours per 100 sq ft |
Fewer joints may reduce taping and finishing work; check access and lifting requirements before ordering. |
| Interior plywood panels |
4 × 8 ft (32 sq ft) |
8–12% |
$0.75–$1.75 per sq ft |
3–6 person-hours per 100 sq ft |
Useful where a panel finish is acceptable; coordinate panel layout with studs to limit extra blocking and offcuts. |
| Medium-density fiberboard (MDF) panels |
Commonly 4 × 8 ft (32 sq ft) |
8–12% |
$1.00–$2.50 per sq ft |
3–6 person-hours per 100 sq ft |
Pre-plan panel joints and trim details; use only in suitable dry interior locations. |
| Fiber-cement interior panels |
Commonly 3 × 5 ft (15 sq ft) |
10–15% |
$1.00–$2.50 per sq ft |
5–9 person-hours per 100 sq ft |
Consider for areas requiring a moisture-tolerant cement board; smaller sheets can mean more joints and handling. |
Estimate notes: Costs are broad planning ranges in U.S. dollars and vary by location, thickness, grade, supplier, and project size. Labor estimates assume accessible, standard residential framing and exclude framing, insulation, demolition, finishing materials, taxes, and disposal. Confirm local prices and installation requirements before purchasing.
Conclusion
Renovation costs depend not only on the price of wall materials but also on how they affect installation time, preparation, and future maintenance. Before starting, set a clear budget that includes materials, labor, tools, and a reasonable allowance for unexpected expenses. Compare options by looking at both purchase and installation costs, since a low-cost material may require more preparation or specialized labor. Consider the room’s use and conditions when choosing a material, so it offers suitable durability without paying for features you do not need.
A practical approach to how to reduce renovation costs with wall materials is to balance upfront savings with long-term value. Durable, easy-to-maintain materials can help limit repairs and replacement expenses. Careful measuring, accurate ordering, and planning cuts before installation can reduce offcuts and waste. Preparing the work area and coordinating installation steps can also save labor time. Together, thoughtful budgeting, material selection, and efficient installation can keep the project economical while still delivering a reliable finish.

 RefDura Panle